/
/
/
SIGMA fp series Cinemagraph tutorial by Paul Monaghan

READ

SIGMA fp series Cinemagraph tutorial by Paul Monaghan

One of the many features found on SIGMA fp series cameras is the ability to create Cinemagraphs using the camera itself. Cinemagraphs are a hybrid of stills and video imagery often displaying hits of movement in an otherwise still image like in this example.
Creating your own Cinemagraphs starts with shooting a shot video sequence. This can be done with RAW DNG video or MOV video files at 4k or 1080p depending on how large an image you need at the end.

Using a tripod would be ideal as you can keep the framing constant throughout the clip, also its best to get the look and feel of your Cinemagraph before recording using the Tone and Color buttons as you have limited control over the look of your Cinemagraph after recording.

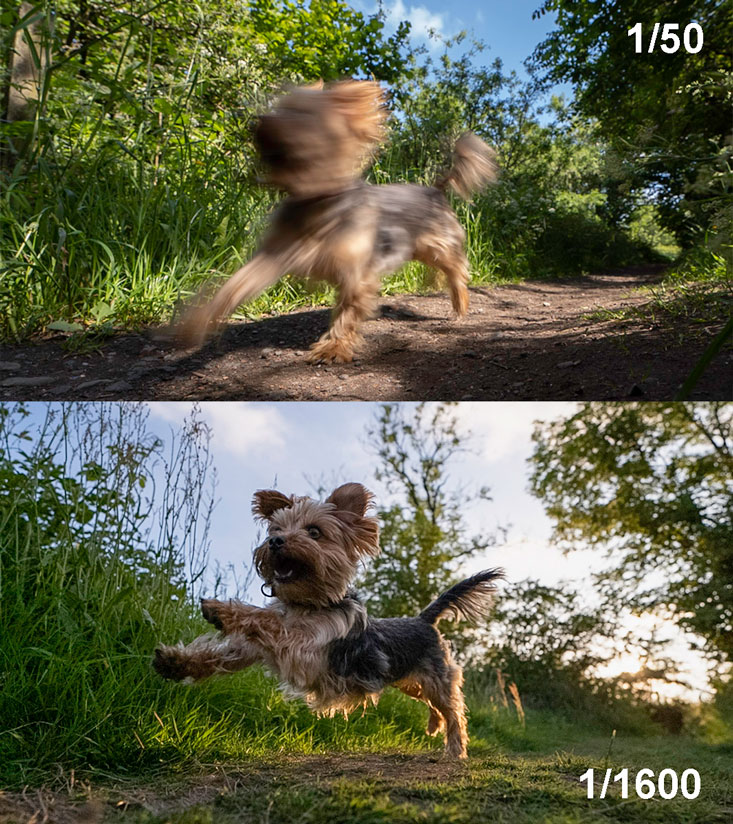
Another factor to think about is your shutter speed, if your planning on freezing a fast-moving object then you will want high shutter speeds in around 1/2000 to get a nice crisp image which I found out after trying recording a clip using the standard 180o shutter rule 1/50 at 25fps.

After preparing the camera for the scene I wanted to capture I then set the camera on the ground, and called my dog so he could run past the camera and recorded this little clip.

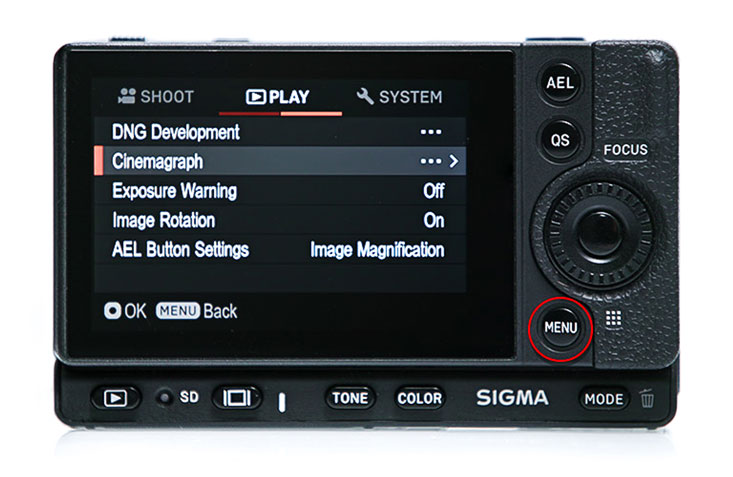
Now that we have a video file, the next step is to press Menu on the camera and moved to the Play option in the menu, in the second tab you will see Cinemagraph.

Press right on the D-pad and the option to create a New or Edit an existing Cinegraph will appear, we will select New.

Then we scroll through the video’s and select the one we want to turn into a Cinemagraph by pressing the button in the middle of the D-pad. In this case I selected the one of my dog.

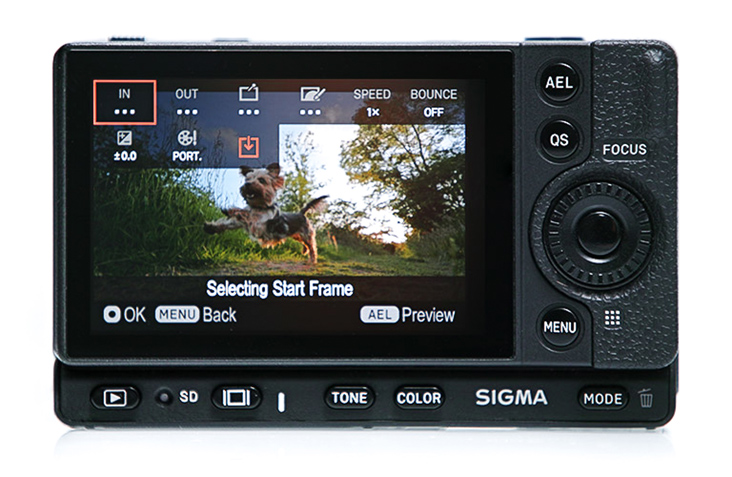
Once selected we get a new screen with many options to control and create the Cinemagraph. We start by pressing “IN”.

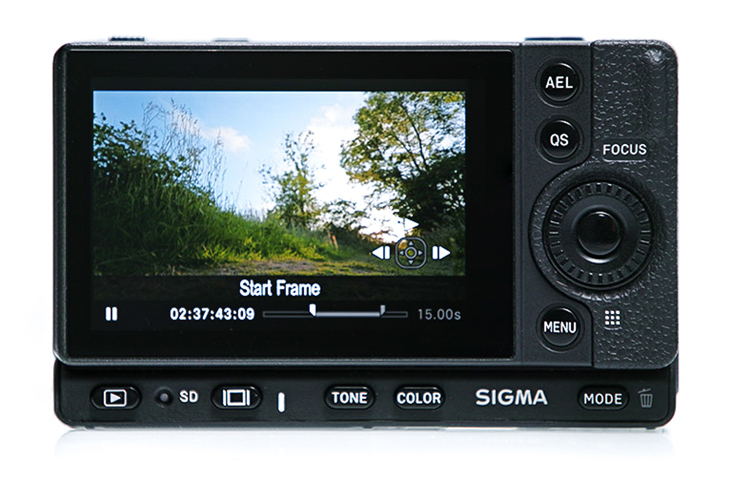
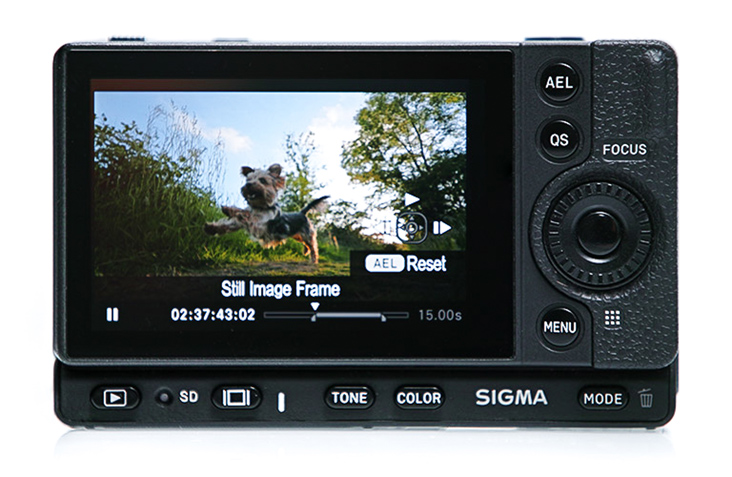
Now we will scroll through the video using the left/right buttons on the D-pad and the middle button to select the Starting frame for the moving part of the image.

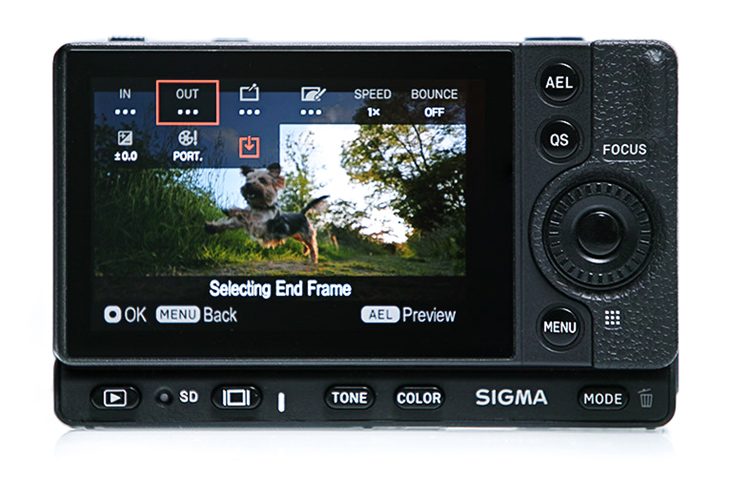
Selecting the starting frame will bring us back to the Cinemagraph menu, next we go to the “OUT” section.

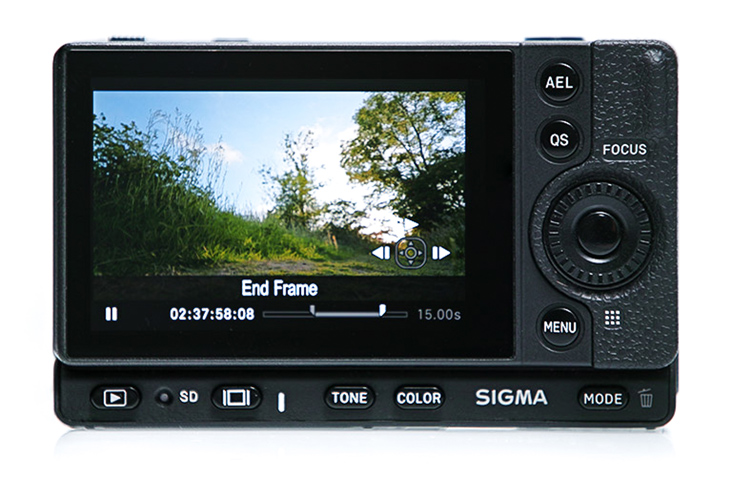
Like the starting frame before, we can move the video along using the D-pad to select an end frame for the moving part of the Cinemagraph.

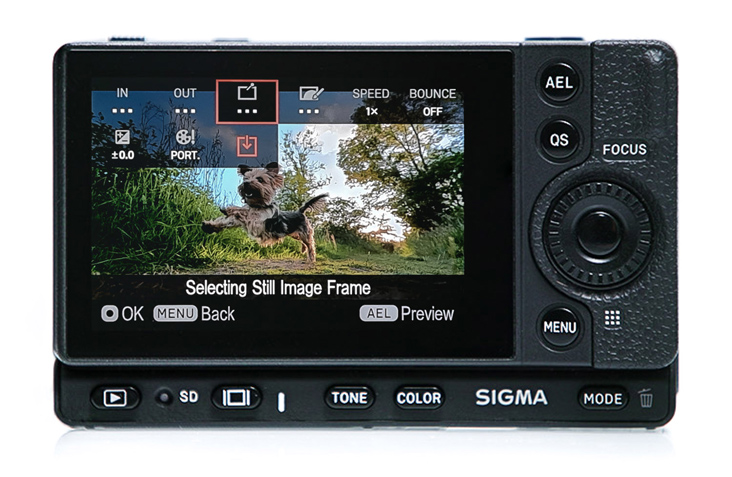
Next up we want to select the still frame for the image, we do this in the third option.

Now we move the video frame till we find the one we want to freeze, for this I selected the one with the dog mid run.

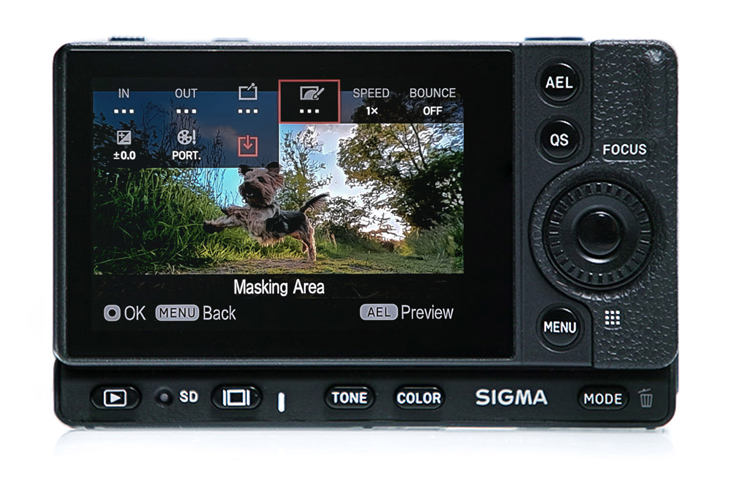
Next we move over to the fourth option to create a masking area.

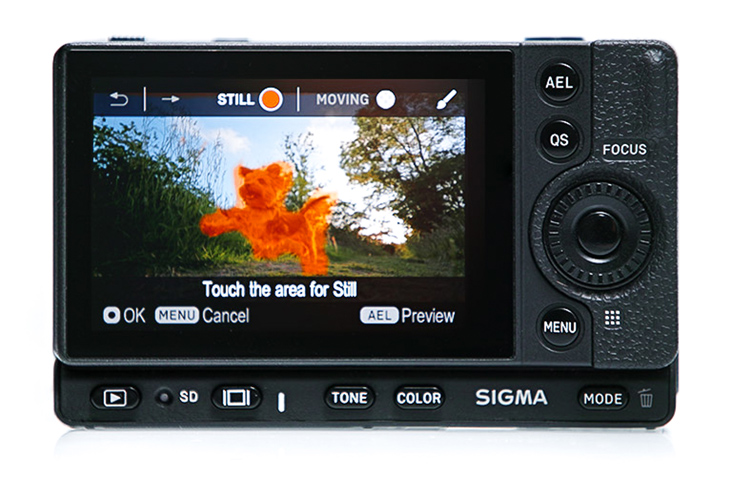
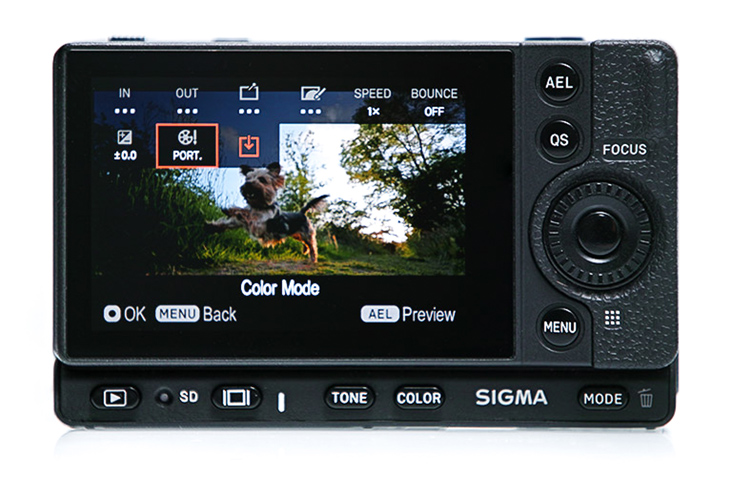
Using this option you paint the part of the image you want to be still using the touch screen. You can swap between the still/moving mask by pressing the buttons.

For this Cinemagraph I masked the dog as I wanted to freeze him in the air while letting the background behind him move, after finishing your mask press the ok button.

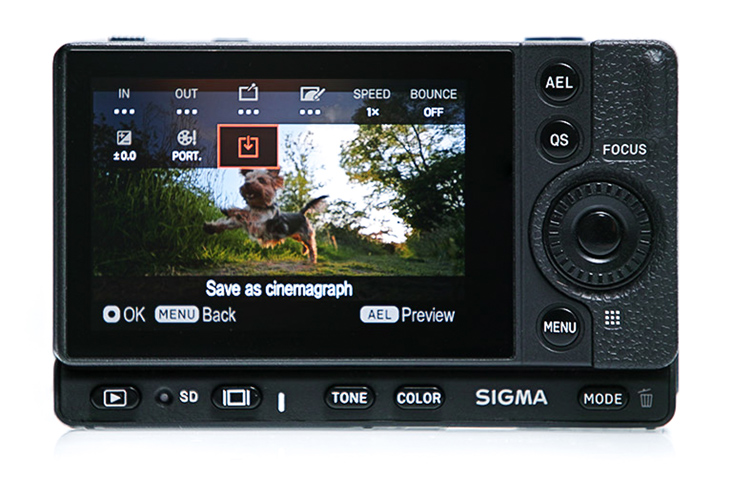
You can now press the AEL button to preview your creation to make sure it’s working as intended and if you are happy you could move to the Save Cinemagraph button to export your creation as a .MOV file.

Here’s my final output which I am very happy with.

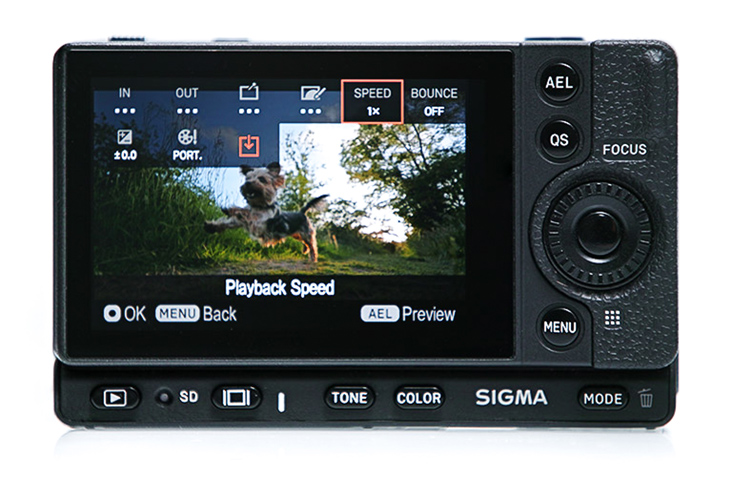
There are a few more options though that are worth going over, the first is the Speed option which allows you to select between 1-4x speed for the moving sections of the image.

There are a few more options though that are worth going over, the first is the Speed option which allows you to select between 1-4x speed for the moving sections of the image.

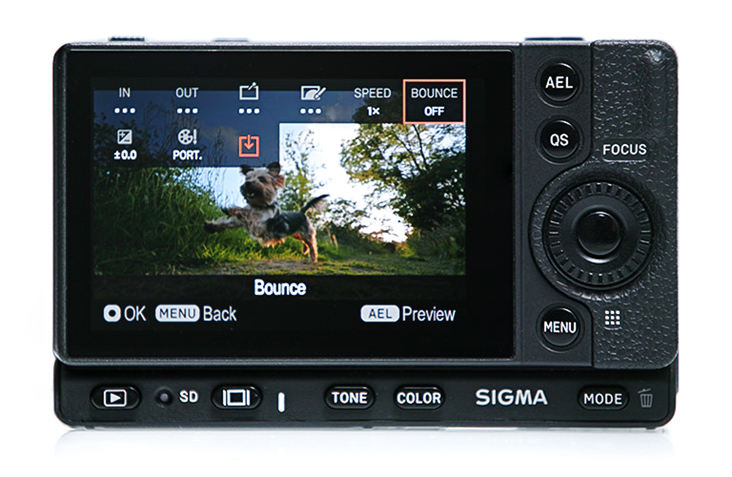
Next is the bounce feature which will play the video in reverse once it reaches the end.

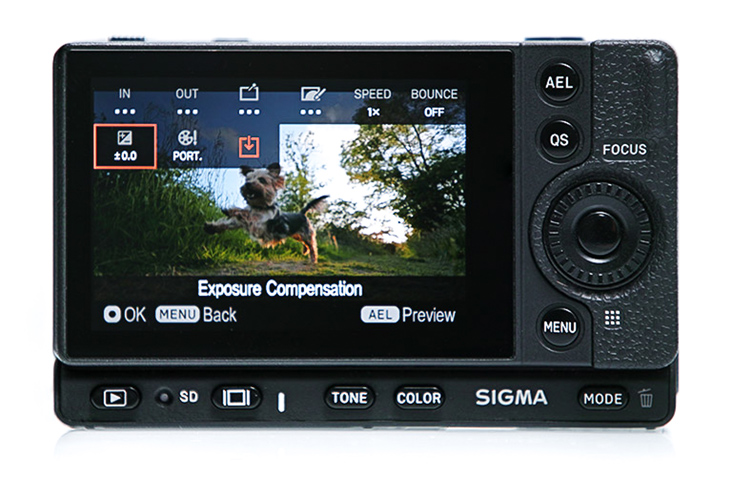
Exposure compensation allows a small -1 to +1 tweak of the brightness of the image for some fine tuning but its better to try nail the exposure before recording.

Lastly we have the Color mode which will only be available if you record in DNG but again its best to set this before recording although its nice to have in case you change your mind.

Hopefully this guild will help more people create Cinemagraphs, I personally find it a fun feature and am looking forward to seeing what else I can create but I also look forward to seeing what others are able to do.

Paul Monaghan /

A self-taught photographer based in Glasgow, Paul initially bought his first camera for its gadget appeal (a super zoom). This purchase led to a newfound love for photography, prompting him to quickly acquire his first DSLR (a Pentax clone) and eventually their first true Pentax camera in 2011. While they have no particular specialty in their photography, they have a fondness for flash style photography. Paul also contributes to the DIY Photography website, sharing his photography knowledge and tips to the world.

SIGMA fp series cameras

Meet the world’s smallest and lightest full-frame mirrorless cameras

Share this post